Tag Archives: flowers

Spring Gardening: When to Dig In

Here in Wisconsin, the spring season can be a bit of a tease. Just when you think it must finally be here for good, you wake up one April morning to find your lawn covered in a fresh blanket of snow. After a long winter, though, most of us can’t wait to get out into the yard, dig our hands into the soil, and start watching seeds grow into luscious crops. Whether you’re a first time gardener, a new homeowner, or a longtime hobbyist, you may find yourself wondering: Isn’t it time to get started?! The good news is: Yes! Our team of gardeners and horticulturists teamed up to share a few rules of “green thumbs” and gardening tips!

AVOIDING KILLING FROSTS

The biggest concern with planting many vegetables and annuals is the occurrence of killing frosts. A general rule of thumb in our area puts safe planting dates around Memorial Day for most years, give or take a week or so. This is an average date; meaning, the likelihood of a killing frost happening after that is rare but, as we all know, can certainly still happen. If you’re looking for a more specific answer, there are web resources to help. You can even find sites that will give you planting recommendations based on your zip code!

SEEDS TO PLANT FIRST

Luckily, there are many frost-tolerant vegetables that can be planted earlier than what we just discussed. These include onion, lettuce, arugula, parsley, spinach, radishes, carrots, parsnips, cabbage, kale, collards, brussel sprouts and broccoli. They actually enjoy the cooler temperatures of early spring and will begin germination when the ground is over 40 degrees. Seeds will fare better than transplants; if you start any of these vegetables in the house before planting, you’ll still want to wait a couple of weeks later than the seeds before putting them in the ground.

SEEDS TO PLANT NEXT

The majority of typical vegetables should be planted after the risk of killing frosts. These include corn, squash, tomatoes, peppers, eggplants, okra, melons, cucumbers and beans. They will be most successful when the ground has warmed enough to retain its temperature during any weather swings. Expect these seeds to shoot up within about a week’s time. If you’ve started any of these vegetables indoors, wait about another week before planting the transplants to ensure the soil and night temperatures are adequately warm.

You’ll still want to keep an eye on the weather, and cover plants with a blanket on nights that hold a risk of frost. Typically, the most damage can occur on cold, clear and windless nights.

STARTING SEEDS INDOORS

Some of the best seeds to start indoors are early transplants, like cauliflower, brussel sprouts or cabbage. Because they take a longer time to mature, they’re a great choice to get a jumpstart on early in the season. Other easy plants to start from seeds are: tomatoes (sown indoors about 6-8 weeks before the last frost), watermelon (4-6 weeks before the last frost), peppers (8-12 weeks), herbs (6-8 weeks), and lettuce (8 weeks).

There are, however, a few plants that shouldn’t be started indoors. Root vegetables (like carrots, radishes, potatoes, and beets) don’t transplant well because damage to the roots will lead to a poor harvest. Squash, cucumbers and beans typically grow rapidly, making them difficult to transplant and easy to damage in trying to do so.

Here at the garden center, we can’t wait to start watching those first vegetables pop up out of the ground, too! Stop on in to pick up your seeds and speak with one of our horticulturists to learn more about successful gardening in our area. We wish you the best of luck in your growing season, and hope to see you soon!

5 Ways to Start Gardening Sustainably

The term “sustainable gardening” may sound daunting at first, but it really boils down to a simple concept: enhancing your space while choosing methods that cause little harm to it. Concern for our environment and the desire to protect and preserve our world for future generations has prompted us to learn, explore, and implement sustainable practices in many aspects of our lifestyles, and landscaping should be no different. There are many ways to bring a bit more “green” to your yard, and we’ve got five easy tips to help get you started!

COMPOSTING

Composting creates nutrient-rich soil with re-purposed organic material, meaning you’ll be improving the size and quantity of your produce, promoting bigger flower blooms, and cutting down on the amount of garbage being sent to the landfill. To get started:

  • Begin with a closed bin about 3′ in size in your yard (you may want to put up a chicken wire fence around it, as well).
  • Compost yard waste, such as leaves and grass clippings, and most kitchen waste (even egg shells, coffee grounds/filters, newspapers, tea bags, toothpicks, and hair!)
  • Avoid composting dairy products, animal products (including bones and fat) and pet waste. These can attract unwanted animals and create unpleasant odors.
  • Equally balance “green waste” (like fruits and vegetables) with “brown waste” (dried lawn clippings, leaves, newspapers). Your compost shouldn’t be sopping wet (and smelly) or very dry; aim to maintain a moist, soil-like texture.
  • Turn with a shovel every week or two.
  • When compost resembles soil, it can be sprinkled and worked in to your gardens!

We compost here at Vande Hey’s, too! Our compost is made from locally-obtained yard materials such as leaves, grass clippings, and garden waste.  Once on our site, the materials are left to break down naturally, usually over 24 to 36 months. The material is turned as often as possible to aid in decomposition and to ensure as much material is broken down as can be. When the yard waste materials are sufficiently broken down, we bring in a shredder to mix in sand and pine fines to firm-up the compost and keep it from becoming overly saturated. Our final blend is about 10% sand, 10% pine fines, and 80% broken-down organic yard waste materials. This blend gives the soil an ability to retain moisture as well asensures adequate drainage. This compost can be purchased at our retail center, as well!

INCORPORATING NATIVE PLANTS

Native plants refer to those that grow naturally in an area, and they hold a vital role in supporting regional wildlife and habitats. Native plants are generally low-maintenance, as they’ve evolved to the area’s climate, soil, moisture, and pest resilience. Because of this adaptation, they generally require much less water and minimize flooding. They also play an important role in supporting your local wildlife! Many native plants provide seeds and nuts for local animals or nectar for pollinators like bees, birds, and butterflies. Try incorporating a few of these favorite native plants in your yard:

  • Columbine: With pretty, vibrant red flowers, this plant is a hummingbird favorite
  • Bee Balm: This plant blooms in various shades of purple, supports a variety of birds and insects, and is a great plant for beginners
  • Aster: An attractive late summer/fall bloom, these plants also support pollinators and are flexible to soil types
  • Wild Geranium: These plants have delicate purple flowers, are flexible to soil and light levels, and pollinator-friendly
  • Butterfly Weed: With bright orange flowers, these plants are excellent for monarch butterflies

MULCHING

We all know that freshly mulched beds are an attractive, effective boost to your home’s curb appeal. But did you know it plays a big role in supporting a sustainable yard? Mulch serves many different purposes, from holding moisture in the soil and maintaining a consistent ground temperature to giving plants a higher survival rate and adding visual interest to your landscape. Because bark mulch is a natural material, it will decompose, leaving behind a nutrient-rich compost that aids in plant growth. Click here to check out our variety of available mulches!

PLANT TREES

Whether it’s fall colors or beautiful spring blooms, trees bring beauty and value to your yard in numerous ways… and they’re a key component in sustainability! Here are a few reasons why:

  • Combating Climate Change– Absorbing carbon dioxide, storing the carbon, and releasing oxygen back into the air, trees do some heavy lifting when it comes to helping out mother nature!
  • Cleaning the Air- Reducing the greenhouse effect and filtering toxins, trees absorb many pollutants and help keep our air clean.
  • Keeping Things Cool- Trees literally keep things cool by offering shade and releasing water vapor into the air through their leaves, cooling temperatures from 2 to 9 degrees. Trees, especially those on the west side of your home, can also help save on your summer cooling costs by providing shade during the hottest part of the day.
  • Preventing Erosion- Trees extensive root systems can help hold soil in place and slow runoff.
  • Supporting Wildlife- Trees provide protection and homes for birds, bees, squirrels and a variety of other species.

RAIN BARRELS

Rain barrels are a simple addition to your home that can really benefit sustainability, as well as your wallet! You can reduce your water bill during the summer months by saving hundreds of gallons of water for garden care, watering flowers, and washing cars. Its also beneficial for plant and soil health: rain water has more oxygen and less salt, chlorine and flouride in it.

Setting up a rain barrel is an easy task! First, make sure you select a spot that’s easily accessible (close to your plants, garden, or patio) and a level surface. Also, you’ll need to make sure its located by one of your home’s downspouts. If you prefer to use a rain barrel with a spigot (rather than just scooping the water out), you’ll probably want to raise it up (cement blocks work great) to make it easier to fill watering cans. Use a flexible downspout to connect the top of your downspout to the rain barrel. You’ll also want to consider adding an overflow hose leading away from the barrel so that any overflow doesn’t empty out right next to your foundation. Finally, you may want to add a screen over the top to keep bugs or other critters out.

As you design your yard, garden, or even seasonal container plantings, keeping sustainable practices in mind is an impactful benefit to our environment. At Vande Hey Company, we are excited to expand, educate and share our knowledge with you! Stop in to discuss native gardening, tree options, or any other sustainable practices with our team – we’re happy to help!

Landscaping Management 101: November

Beautiful autumn days mean comfortable working temperatures and hopefully time to continue prepping for winter. The more you do now, the easier things will be in the spring! Put things away, organize, protect, and enjoy the remaining fruits of your hard labor throughout this past year!

EARLY NOVEMBER

  • Deciduous trees, shrubs, and spring bulbs can be planted until the ground freezes.
  • Keep fallen leaves from piling up on your lawn.  This will prevent smothering this winter.
  • Outdoor planters, baskets, etc. should be emptied and washed before storing for next year.
  • Mulch in roses with 8 to 10 inches of soil or shredded bark. 
  • Water all evergreens before the ground freezes to keep them from drying out over winter.
  • Spray plants with repellents to protect them from rabbits, deer, and mice.
  • Harvest cole crops as long as possible since they are made sweeter by frost (Common cole crops include broccoli, Brussels sprouts, cabbage, cauliflower, collards, kale, and kohlrabi).

MID NOVEMBER

  • Cut the lawn short (2-2.5 inches) once the leaves are off the trees to discourage snow mold and mice tunneling.
  • Protect strawberries with a 6-inch layer of clean, loose marsh hay. (We use marsh hay because it contains fewer weed seeds and stays “fluffier.”)
  • Protect tender perennials with a 2 to 3 inch layer of fresh balsam boughs.
  • Protect tree trunks from pest damage by surrounding with plastic or wire 1-2 feet higher than expected snowfall.

LATE NOVEMBER

  • Stop fertilizing houseplants since they will use less water and nutrients due to lower light levels.
  • Move pesticides and equipment to a place where they will not freeze.
  • Wash off garden tools and dry completely when storing for winter. Use a rag dipped in oil to wipe down metal parts of tools. Wipe down wooden parts with linseed oil to keep the wood from drying out.
  • Cover cole crops to prevent them from freezing solid.
  • Cut down and discard asparagus stems and leaves that have yellowed to reduce disease and insect issues next year.
  • Enjoy Thanksgiving Dinner – the fruits of your labor.

Landscaping Management 101: October

Winter is coming! Living in Wisconsin, we are accustomed to winter showing up early so, whether we like it or not, it is time to start preparing. Even light frosts can pose dangers for more tender plants like your begonias, tomatoes, and peppers. Be prepared ahead of time so you do not get caught off guard!

EARLY OCTOBER

  • Store bulbs of summer-flowering tender perennials (cannas, calla lily, begonias) if you haven’t already.
  • Spot treat broadleaf weeds. This is most effective after the first light frost or multiple nights in a row with temperatures into the 30’s.
  • Collect soil samples now for testing if desired to prepare for next year’s fertilization.
  • Protect tender vegetables if early frost is predicted by covering them just before sundown.
  • Dig up any frost-sensitive annuals and to bring them indoors for winter blooms.

MID OCTOBER

  • Finish planting tulips, daffodils, crocus, and hyacinth.
  • Begin winterization of plant material.
  • Remove and compost asparagus, peony, and rhubarb tops.
  • Individual garlic cloves can be planted and will result in full garlic bulbs next year.
  • Fertilize established trees and shrubs. Fertilization is especially recommended for more unique varieties and plants under stress.
  • Fertilize houseplants for the last time until March.

LATE OCTOBER

  • Wrap trunks of young or thin-barked trees such as green ash, honeylocust, maple, and linden with tree wrap.
  • Rake or mow leaves and make sure thick leaves are not left under the snow all winter. If leaves have fungus or disease make sure to remove them.
  • Continue mowing the lawn until it stops growing.
  • Note crabgrass areas of lawn after they are killed by hard frost and apply crabgrass preventer to prevent its return in the future.
  • Drain hoses and empty bird baths before the first hard frost.

Landscaping Management 101: September

As we enter into September, the heat of summer will finally begin to diminish as we enjoy cooler evening temperatures. The cooler temperatures create a great opportunity for some transplanting, sowing grass seed, and utilizing various herbicides as we continue to enjoy harvesting various fruits and vegetables. Let’s dive into our September Landscape Management 101.

EARLY SEPTEMBER

  • Divide spring and summer-flowering perennials.  These include peonies, daylilies, irises, oriental poppies, phlox, and many others. However, if the plant is currently blooming then it should not be divided.
  • September is a great time to plant evergreen trees!
  • Trim “Bleeder” trees such as Birch, Maple, and Elm.
  • Control broadleaf weeds in the lawn with appropriate application. Either spot treat or apply weed and feed products.
  • Seed bare spots in lawn, sow lawn seed, and/or install sod.
  • Plant spring-flowering bulbs (Tulips, Daffodils, Crocus, Hyacinth).
  • Take cuttings of shade-loving flowering annuals and herbs for growing indoors throughout the winter if desired.

MID SEPTEMBER

  • Bring house plants back indoors. Keep an eye out for insects! One way to minimize insects is to give the plant a good blast of water before bringing it inside.
  • Continue to plant spring-blooming bulbs.
  • Aerate lawn if desired to smooth out bumpy lawns, allow air and moisture to penetrate root zone, and breakdown thatch layer.
  • Harvest tender vegetables before frost.

LATE SEPTEMBER

  • Many late apple varieties can be harvested.
  • Harvest dahlias and other summer bulbs after a killing frost – when plants turn black.
  • Collect dried flowers for fall arrangements.
  • While most trees will not start losing leaves quite yet, make sure to rake up and remove any leaves affected by fungal or bacterial diseases.

As always we are here for you! Stop by with your questions or to pick up necessary fertilizers and herbicides today!

Landscaping Management 101: August

One more month of heat to go before things start cooling off! Luckily, August brings a lighter workload with a focus on continuing basic upkeep and spraying your favorite plants regularly to protect them until the feeding frenzy ends. Once the night temperatures begin to drop later in September many pests will return to the ground and your battle against pests will diminish.

EARLY AUGUST

  • Keep garden weeds from going to seed.
  • Continue to monitor aphids as they will show up all season long. Combat with a strong blast of water or insecticidal soap.
  • Continue controlling cucumber beetles that spread bacterial wilt with weekly dusts of insecticides.
  • Avoid pruning trees and shrubs because the new growth may not harden off in time for winter.
  • Enjoy harvesting your fruit and vegetables regularly to avoid attracting more pests with overripe fruit.

MID AUGUST

  • Disbud dahlias for extra-large flowers.
  • Prune out old raspberry canes to prepare for next year and avoid disease. Leave 3-4 canes per foot of row.
  • Divide Iris and check for rhizome rots. Destroy all infected plants.
  • Continue watering flower beds once a week in dry periods.
  • Harvest early apples.
  • Dig early potatoes as vines die down.

LATE AUGUST

  • Continue to maintain spray program on fruit trees.
  • Harvest pears as they become light green.
  • Divide spring flowering perennials.
  • Now is a great time to seed or sod new lawns or repair damaged areas in existing lawns.
  • Continue deadheading to prepare for a final late-season flower display.

Have questions? Not sure which insecticide to use? Call or stop by Vande Hey Company today and we can give suggestions, recommend products, and walk with you as you continue striving towards your backyard dream oasis. Call 920.788.6344 today!

A Moment to Thank Our Honeybees

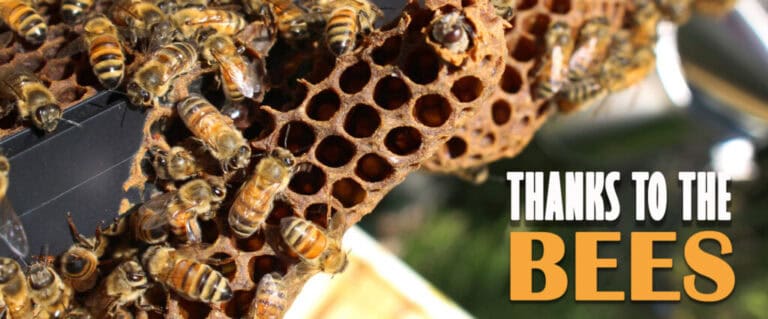
Let’s take a moment to thank our hardworking honeybees (Apis mellifera) and their dedication to pollinating our flowers! 

Bees are often considered the most important pollinators, with honeybees accounting for 84% of all insect pollination.  These flying golden beauties are particularly good pollinators due to pollen-collecting structures on their bodies: the scopa (or pollen basket) which holds pollen balls on their hind legs; the corbicula, a fuzzy mat of hair that gathers pollen when traveling from flower to flower; and the crop (or honey stomach) which holds nectar as they travel from flower to flower. 

Bee species also display floral constancy, staying within the same type of flower to collect pollen. This is important in orchards, where many farmers rely on bees to pollinate their fruit trees and vegetables’ flowers. 

If you are looking to promote our favorite pollinators, consider the most attractive flower traits in the eyes of a honeybee. Of all colors, honeybees can see shades of yellows and violets the best, making yellow and blue-purple flowers a great addition to any pollinator garden. Like us, honeybees enjoy fresh, mild, and pleasant floral aromas, and flowers with plenty of nectar. Purple bee balm, coneflower, and New England asters are common honeybee favorites.

Pollinator decline is a major concern for all species of insects, bats, and birds which pollinate our flowers. The causes of Colony Collapse Disorder in honeybees is a combination of pests and pathogens introduced to the hive, poor nutrition, pesticide use, and habitat fragmentation. The best way that homeowners and businesses can help honeybee populations is to plant more flowers and reduce pesticide use on your property. 

Luckily, the Vande Hey Company has plenty of perennials, annuals, and even flowering trees that your local honeybees will adore!

Landscaping Management 101: July

Things are heating up and summer is moving full force ahead. Along with the heat, keeping things hydrated and battling disease will be our biggest challenge. Don’t forget to keep yourself hydrated as well as you move forward with your July Landscape Management 101!

EARLY JULY

  • Stop harvesting asparagus and rhubarb.
  • Don’t neglect vegetable garden; continue weed control and watch leaves for signs of disease.
  • Water flower border once a week during dry periods.
  • Spray or dust tomatoes for blight control.
  • Spray or dust squashes, melons, and cucumbers to prevent bacterial wilt.
  • Deadhead annuals and perennials after flowering to encourage the plant to spend its energy producing more flowers or foliage and roots.
  • Fertilize flowering annuals to give an extra boost of energy.

MID JULY

  • Prune Yews, Junipers, and Arborvitae by mid-July.
  • Watch for rust on hollyhocks.
  • Renovate old strawberry plantings when bearing is finished.
  • Pick off dead flowers for attractive borders and blooms.
  • Keep an eye out for webs from webworm on woody plants. Cut out branches wrapped in webbing and spray with insecticide.
  • Keep plants, especially vegetables, evenly moist to promote good health as it gets warmer.
  • Harvest raspberries regularly to help discourage insects.

LATE JULY

  • Stop feeding roses and most perennials.
  • Tie Dahlias to stakes.
  • Keep lawn mown at 2 1/2” height.
  • Make last granular fertilizer applications on woody plants.
  • Alpine Currant shrubs infected with fungus will lose leaves and may defoliate completely. Fallen leaves should be removed and destroyed to reduce infection next year.
  • Watch for powdery mildew and leaf spot diseases on flowers and ornamentals.
  • Honeysuckles susceptible to aphids should be sprayed every 10-14 days with insecticidal soap.

As always, let us know if you have questions! We can give suggestions, recommend product, and help you create the beautiful backyard you’re striving toward. Call 920.788.6344 today!

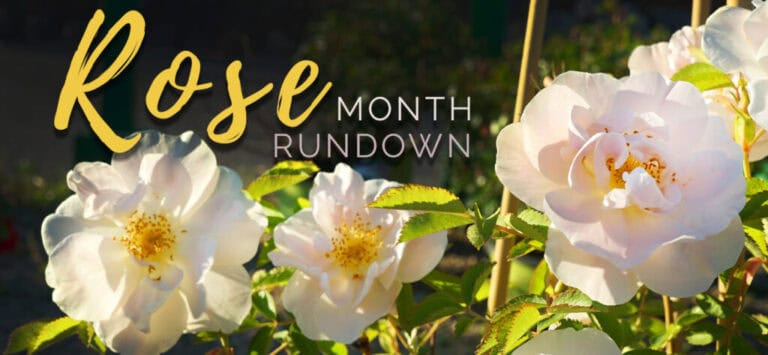
Rose Month Rundown- The Complete Guide To Roses

A whole month dedicated to a plant? You better believe it! Roses hold a special place in the hearts and minds of people everywhere. Their striking beauty and lovely fragrance not only elevate your garden but also have come to symbolize love, war, history, shows like The Bachelor, and even movies such as Beauty and the Beast. While some view roses as difficult, we are here to tell you that roses, just like relationships, just need just a little extra love and effort. Here are our tips for bringing the elegance of roses and all they stand for into your backyard.

FROM THE BEGINNING

Planning ahead will not only impact the success of your roses but also help you highlight their beauty. When choosing where your roses will be placed, you want to look for a location with at least 6 hours of sun and good drainage. Planting next to a South or West facing fence or wall will help minimize the damage of our harsh Wisconsin winters. You also want to plan how your roses will be used whether it is as focal points, border shrubs, climbing vines, etc. Determining the use will help you choose the variety in addition to looking for disease-resistant and locally-hardy varieties.

When planting roses, mixing in leaf compost and adding root stimulator will help the plant get established and also create more even soil conditions which will lead to greater health and longevity.

GENERAL CARE

Roses do their best when the soil moisture is uniform so regular watering on hot and humid days can make a big difference. When watering it is best to water in the morning at ground level or use soaker hoses. Wet leaves, especially at night, are much more prone to diseases such as powdery mildew and black spot.

Hard pruning is best done in early spring (March/April). In addition to removing dead and damaged canes, we recommend cutting back 1/3 to 1/2 of the previous year’s growth until you find a healthy white center inside the cane. We also recommend light pruning throughout the season to keep your roses looking pristine!

Deadheading roses will encourage reblooming if your varieties do not develop rose hips. Leaving as much foliage on the canes as you can, cut back just below the first leaflet to encourage the foliage to continue drawing up nutrients all the way to the top.

There are multiple options for fertilizing roses, so we encourage you to stop by and ask us about your options. Whether it is a slow-release granular product or a liquid fertilizer, your roses are working hard to look beautiful and need the extra boost! You can fertilize throughout the growing season, but we recommend you stop feeding late in the summer to allow growth to slow and enter the dormant stage before winter.

BATTLING DISEASE AND INSECTS

Powdery Mildew will cause leaves to curl and twist leaving white powdery spots on the leaves. This is best prevented by proper watering as described in the general care as well as pruning to allow for air circulation.

Black Spot will leave circular black or brown spots on the tops of the leaves, starting at the bottom and working their way up. Eventually it will cause defoliation but is best prevented the same way as powdery mildew. Some basic rose care products can also take care of black spot and powdery mildew.

Insects including aphids, Japanese beetles, spider mites, and sawflies are best controlled with basic rose care products such as neem oil or insecticidal soaps. Aphids can also sometimes be handled by blasting with water in the morning.

DISPLAYING

Roses can be the highlight of your garden, but also the highlight on your or your loved one’s counter. Roses cut for display are best cut right when the petals are opening using a sharp blade to ensure a clean cut and undamaged water channels. The best time is when they are well hydrated in the early morning or evening hours. To eliminate air bubbles and encourage water uptake, you should recut the stems at a 45-degree-angle just before putting them into the vase. Strip the leaves below the water line, add other flowers like baby’s breath if desired, and change water frequently to create a gorgeous and long-lasting display!

After all of this information you can probably see why roses need a whole month to be highlighted and celebrated! Show some extra love to your roses this month and they will continue to spread the love and beauty they manifest in your yard and in your home.

Landscaping Management 101: June

June is Rose Month, so let’s work hard, but don’t forget to stop and smell the roses! We are saying goodbye to the spring and hello to the start of summer! We will also be saying hello to gorgeous annual and perennial flowers and unfortunately the pests that come along with the warmer weather. Let’s get right to it with your June Landscape Management 101!

EARLY JUNE

  • Prune all spring flowering shrubs as they finish blooming.
  • Cut peony blooms when they are one-third open if you want to bring them in for cut flowers.
  • Plant late potatoes and cabbage.
  • Fertilize bulbs and most perennial flowers now. The bulbs will be forming for next year and the perennials will be actively producing flowers!
  • Prune and transplant houseplants experiencing vigorous growth due to increased light and warmer temperatures. Fertilize monthly.
  • Control heavy plant bug damage on honey locust and ash foliage with insecticides.
  • Inspect your vegetable garden for pests, covering and spraying as necessary. If you have specific questions check with a Vande Hey Company horticulturist.
  • Spray fruit trees.
  • Cut back late spring blooming perennials such as yarrow and salvia to encourage a second flush of blooms in summer.
  • Aphids can be treated with a strong jet of water or insecticidal soap. They are typically identified by curling foliage, sticky leaves, and black sooty mold.

MID JUNE

  • Cut back delphinium after blooming.
  • Allow only 1 dahlia shoot per clump
  • Mulch woody plants to control weeds, retain moisture, and modify soil temperature extremes.
  • Stake and mulch tomatoes; thin annual flowers and vegetables.
  • Sow perennial seeds and label all perennials.
  • Remove seed clusters from lilacs.
  • Check spruce and arborvitaes for spider mites. Thoroughly wet plants with hose if present.
  • If you have not mulched yet, 2-4” of fresh mulch will discourage weeds, hold moisture, and maintain even soil temperatures. Mulch rings around trees can also prevent mower damage.

LATE JUNE

  • Pinch out tips of black raspberry shoots when 3 feet tall.
  • Remove leaves of spring flowering bulbs after they turn yellow for best development and growth next year.
  • Set house plants on shaded patio as night temperature warms.
  • Fertilize roses after first full flush of blooms.
  • Keep an eye out for Japanese beetle adults and get ready to treat grubs.

As always, let us know if you have questions! We can give suggestions, recommend product, and help you create the beautiful backyard you’re striving toward. Call 920.788.6344 today!