Tag Archives: theideacenter

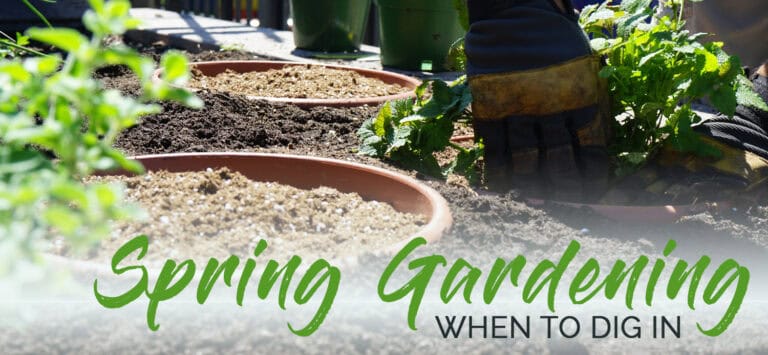
Spring Gardening: When to Dig In

Here in Wisconsin, the spring season can be a bit of a tease. Just when you think it must finally be here for good, you wake up one April morning to find your lawn covered in a fresh blanket of snow. After a long winter, though, most of us can’t wait to get out into the yard, dig our hands into the soil, and start watching seeds grow into luscious crops. Whether you’re a first time gardener, a new homeowner, or a longtime hobbyist, you may find yourself wondering: Isn’t it time to get started?! The good news is: Yes! Our team of gardeners and horticulturists teamed up to share a few rules of “green thumbs” and gardening tips!

AVOIDING KILLING FROSTS

The biggest concern with planting many vegetables and annuals is the occurrence of killing frosts. A general rule of thumb in our area puts safe planting dates around Memorial Day for most years, give or take a week or so. This is an average date; meaning, the likelihood of a killing frost happening after that is rare but, as we all know, can certainly still happen. If you’re looking for a more specific answer, there are web resources to help. You can even find sites that will give you planting recommendations based on your zip code!

SEEDS TO PLANT FIRST

Luckily, there are many frost-tolerant vegetables that can be planted earlier than what we just discussed. These include onion, lettuce, arugula, parsley, spinach, radishes, carrots, parsnips, cabbage, kale, collards, brussel sprouts and broccoli. They actually enjoy the cooler temperatures of early spring and will begin germination when the ground is over 40 degrees. Seeds will fare better than transplants; if you start any of these vegetables in the house before planting, you’ll still want to wait a couple of weeks later than the seeds before putting them in the ground.

SEEDS TO PLANT NEXT

The majority of typical vegetables should be planted after the risk of killing frosts. These include corn, squash, tomatoes, peppers, eggplants, okra, melons, cucumbers and beans. They will be most successful when the ground has warmed enough to retain its temperature during any weather swings. Expect these seeds to shoot up within about a week’s time. If you’ve started any of these vegetables indoors, wait about another week before planting the transplants to ensure the soil and night temperatures are adequately warm.

You’ll still want to keep an eye on the weather, and cover plants with a blanket on nights that hold a risk of frost. Typically, the most damage can occur on cold, clear and windless nights.

STARTING SEEDS INDOORS

Some of the best seeds to start indoors are early transplants, like cauliflower, brussel sprouts or cabbage. Because they take a longer time to mature, they’re a great choice to get a jumpstart on early in the season. Other easy plants to start from seeds are: tomatoes (sown indoors about 6-8 weeks before the last frost), watermelon (4-6 weeks before the last frost), peppers (8-12 weeks), herbs (6-8 weeks), and lettuce (8 weeks).

There are, however, a few plants that shouldn’t be started indoors. Root vegetables (like carrots, radishes, potatoes, and beets) don’t transplant well because damage to the roots will lead to a poor harvest. Squash, cucumbers and beans typically grow rapidly, making them difficult to transplant and easy to damage in trying to do so.

Here at the garden center, we can’t wait to start watching those first vegetables pop up out of the ground, too! Stop on in to pick up your seeds and speak with one of our horticulturists to learn more about successful gardening in our area. We wish you the best of luck in your growing season, and hope to see you soon!

5 Ways to Start Gardening Sustainably

The term “sustainable gardening” may sound daunting at first, but it really boils down to a simple concept: enhancing your space while choosing methods that cause little harm to it. Concern for our environment and the desire to protect and preserve our world for future generations has prompted us to learn, explore, and implement sustainable practices in many aspects of our lifestyles, and landscaping should be no different. There are many ways to bring a bit more “green” to your yard, and we’ve got five easy tips to help get you started!

COMPOSTING

Composting creates nutrient-rich soil with re-purposed organic material, meaning you’ll be improving the size and quantity of your produce, promoting bigger flower blooms, and cutting down on the amount of garbage being sent to the landfill. To get started:

  • Begin with a closed bin about 3′ in size in your yard (you may want to put up a chicken wire fence around it, as well).
  • Compost yard waste, such as leaves and grass clippings, and most kitchen waste (even egg shells, coffee grounds/filters, newspapers, tea bags, toothpicks, and hair!)
  • Avoid composting dairy products, animal products (including bones and fat) and pet waste. These can attract unwanted animals and create unpleasant odors.
  • Equally balance “green waste” (like fruits and vegetables) with “brown waste” (dried lawn clippings, leaves, newspapers). Your compost shouldn’t be sopping wet (and smelly) or very dry; aim to maintain a moist, soil-like texture.
  • Turn with a shovel every week or two.
  • When compost resembles soil, it can be sprinkled and worked in to your gardens!

We compost here at Vande Hey’s, too! Our compost is made from locally-obtained yard materials such as leaves, grass clippings, and garden waste.  Once on our site, the materials are left to break down naturally, usually over 24 to 36 months. The material is turned as often as possible to aid in decomposition and to ensure as much material is broken down as can be. When the yard waste materials are sufficiently broken down, we bring in a shredder to mix in sand and pine fines to firm-up the compost and keep it from becoming overly saturated. Our final blend is about 10% sand, 10% pine fines, and 80% broken-down organic yard waste materials. This blend gives the soil an ability to retain moisture as well asensures adequate drainage. This compost can be purchased at our retail center, as well!

INCORPORATING NATIVE PLANTS

Native plants refer to those that grow naturally in an area, and they hold a vital role in supporting regional wildlife and habitats. Native plants are generally low-maintenance, as they’ve evolved to the area’s climate, soil, moisture, and pest resilience. Because of this adaptation, they generally require much less water and minimize flooding. They also play an important role in supporting your local wildlife! Many native plants provide seeds and nuts for local animals or nectar for pollinators like bees, birds, and butterflies. Try incorporating a few of these favorite native plants in your yard:

  • Columbine: With pretty, vibrant red flowers, this plant is a hummingbird favorite
  • Bee Balm: This plant blooms in various shades of purple, supports a variety of birds and insects, and is a great plant for beginners
  • Aster: An attractive late summer/fall bloom, these plants also support pollinators and are flexible to soil types
  • Wild Geranium: These plants have delicate purple flowers, are flexible to soil and light levels, and pollinator-friendly
  • Butterfly Weed: With bright orange flowers, these plants are excellent for monarch butterflies

MULCHING

We all know that freshly mulched beds are an attractive, effective boost to your home’s curb appeal. But did you know it plays a big role in supporting a sustainable yard? Mulch serves many different purposes, from holding moisture in the soil and maintaining a consistent ground temperature to giving plants a higher survival rate and adding visual interest to your landscape. Because bark mulch is a natural material, it will decompose, leaving behind a nutrient-rich compost that aids in plant growth. Click here to check out our variety of available mulches!

PLANT TREES

Whether it’s fall colors or beautiful spring blooms, trees bring beauty and value to your yard in numerous ways… and they’re a key component in sustainability! Here are a few reasons why:

  • Combating Climate Change– Absorbing carbon dioxide, storing the carbon, and releasing oxygen back into the air, trees do some heavy lifting when it comes to helping out mother nature!
  • Cleaning the Air- Reducing the greenhouse effect and filtering toxins, trees absorb many pollutants and help keep our air clean.
  • Keeping Things Cool- Trees literally keep things cool by offering shade and releasing water vapor into the air through their leaves, cooling temperatures from 2 to 9 degrees. Trees, especially those on the west side of your home, can also help save on your summer cooling costs by providing shade during the hottest part of the day.
  • Preventing Erosion- Trees extensive root systems can help hold soil in place and slow runoff.
  • Supporting Wildlife- Trees provide protection and homes for birds, bees, squirrels and a variety of other species.

RAIN BARRELS

Rain barrels are a simple addition to your home that can really benefit sustainability, as well as your wallet! You can reduce your water bill during the summer months by saving hundreds of gallons of water for garden care, watering flowers, and washing cars. Its also beneficial for plant and soil health: rain water has more oxygen and less salt, chlorine and flouride in it.

Setting up a rain barrel is an easy task! First, make sure you select a spot that’s easily accessible (close to your plants, garden, or patio) and a level surface. Also, you’ll need to make sure its located by one of your home’s downspouts. If you prefer to use a rain barrel with a spigot (rather than just scooping the water out), you’ll probably want to raise it up (cement blocks work great) to make it easier to fill watering cans. Use a flexible downspout to connect the top of your downspout to the rain barrel. You’ll also want to consider adding an overflow hose leading away from the barrel so that any overflow doesn’t empty out right next to your foundation. Finally, you may want to add a screen over the top to keep bugs or other critters out.

As you design your yard, garden, or even seasonal container plantings, keeping sustainable practices in mind is an impactful benefit to our environment. At Vande Hey Company, we are excited to expand, educate and share our knowledge with you! Stop in to discuss native gardening, tree options, or any other sustainable practices with our team – we’re happy to help!

Landscaping Management 101: November

Beautiful autumn days mean comfortable working temperatures and hopefully time to continue prepping for winter. The more you do now, the easier things will be in the spring! Put things away, organize, protect, and enjoy the remaining fruits of your hard labor throughout this past year!

EARLY NOVEMBER

  • Deciduous trees, shrubs, and spring bulbs can be planted until the ground freezes.
  • Keep fallen leaves from piling up on your lawn.  This will prevent smothering this winter.
  • Outdoor planters, baskets, etc. should be emptied and washed before storing for next year.
  • Mulch in roses with 8 to 10 inches of soil or shredded bark. 
  • Water all evergreens before the ground freezes to keep them from drying out over winter.
  • Spray plants with repellents to protect them from rabbits, deer, and mice.
  • Harvest cole crops as long as possible since they are made sweeter by frost (Common cole crops include broccoli, Brussels sprouts, cabbage, cauliflower, collards, kale, and kohlrabi).

MID NOVEMBER

  • Cut the lawn short (2-2.5 inches) once the leaves are off the trees to discourage snow mold and mice tunneling.
  • Protect strawberries with a 6-inch layer of clean, loose marsh hay. (We use marsh hay because it contains fewer weed seeds and stays “fluffier.”)
  • Protect tender perennials with a 2 to 3 inch layer of fresh balsam boughs.
  • Protect tree trunks from pest damage by surrounding with plastic or wire 1-2 feet higher than expected snowfall.

LATE NOVEMBER

  • Stop fertilizing houseplants since they will use less water and nutrients due to lower light levels.
  • Move pesticides and equipment to a place where they will not freeze.
  • Wash off garden tools and dry completely when storing for winter. Use a rag dipped in oil to wipe down metal parts of tools. Wipe down wooden parts with linseed oil to keep the wood from drying out.
  • Cover cole crops to prevent them from freezing solid.
  • Cut down and discard asparagus stems and leaves that have yellowed to reduce disease and insect issues next year.
  • Enjoy Thanksgiving Dinner – the fruits of your labor.

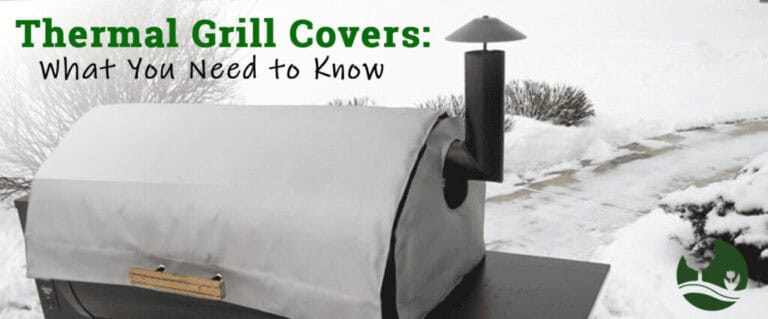
Do I Really Need a Thermal Blanket for My Pellet Grill?

If you have purchased a pellet grill, you have most likely asked yourself if it is worth the extra investment for a thermal blanket, especially when you still need a regular cover, and you just purchased an expensive pellet grill. Here’s your short answer—yes. It will save you time and money and pay for itself!

How does a thermal blanket work?

A thermal blanket is essentially a cover for the grill that insulates the grill cavity while you are cooking. By holding in heat that would otherwise escape, the grill runs more efficiently saving you pellets, time, and money.

At about 60°F with no wind and no food on the grill, a Green Mountain Grill will burn through about 1.2 pounds of pellets per hour at 350°F. With a brisk Wisconsin wind, cold temperatures, and food on the grill you can burn through pellets at more than double that rate. You might even have some trouble getting up to your desired temperature. Now you are burning through pellets, waiting longer for your grill, and definitely struggling to control your temperature. Adding a thermal blanket may not be necessary in warm climates, but here in Wisconsin it is huge for minimizing these challenges.

Benefits of a thermal blanket.

·    Save up to 50% on pellets. While this number will be on the higher end during colder seasons, you will almost always see some sort of benefit. This is truly the biggest benefit and the area where you will save the most money.

·    Reach higher temperatures faster. During cooler seasons, your pellet grill may take a long time to get up to temperature or it may never reach your desired temperature. With a thermal blanket, you will decrease your startup time and have more success with the higher temps.

·    Regulate temperature. With less wind and heat escaping, your grill will be able to more efficiently regulate the temperature and lead to better results.

·    Grill year-round! Cold weather? No problem. PRO TIP: If it is REALLY cold, try tucking your grill somewhere out of the wind and make sure to wrap it up with a thermal blanket.

Even when it is not the dead of winter, a thermal blanket will save you money by increasing your grill’s pellet efficiency. With a thermal blanket, you will be grilling delicious food year-round without paying astronomical amounts for pellets. Happy grilling.

Landscaping Management 101: October

Winter is coming! Living in Wisconsin, we are accustomed to winter showing up early so, whether we like it or not, it is time to start preparing. Even light frosts can pose dangers for more tender plants like your begonias, tomatoes, and peppers. Be prepared ahead of time so you do not get caught off guard!

EARLY OCTOBER

  • Store bulbs of summer-flowering tender perennials (cannas, calla lily, begonias) if you haven’t already.
  • Spot treat broadleaf weeds. This is most effective after the first light frost or multiple nights in a row with temperatures into the 30’s.
  • Collect soil samples now for testing if desired to prepare for next year’s fertilization.
  • Protect tender vegetables if early frost is predicted by covering them just before sundown.
  • Dig up any frost-sensitive annuals and to bring them indoors for winter blooms.

MID OCTOBER

  • Finish planting tulips, daffodils, crocus, and hyacinth.
  • Begin winterization of plant material.
  • Remove and compost asparagus, peony, and rhubarb tops.
  • Individual garlic cloves can be planted and will result in full garlic bulbs next year.
  • Fertilize established trees and shrubs. Fertilization is especially recommended for more unique varieties and plants under stress.
  • Fertilize houseplants for the last time until March.

LATE OCTOBER

  • Wrap trunks of young or thin-barked trees such as green ash, honeylocust, maple, and linden with tree wrap.
  • Rake or mow leaves and make sure thick leaves are not left under the snow all winter. If leaves have fungus or disease make sure to remove them.
  • Continue mowing the lawn until it stops growing.
  • Note crabgrass areas of lawn after they are killed by hard frost and apply crabgrass preventer to prevent its return in the future.
  • Drain hoses and empty bird baths before the first hard frost.

Fall Bulbs: Preparing Now for Spring’s Blooms

Fall is officially here and many of us couldn’t be more excited about mums, kale, pumpkins, and fall decor. Thinking of spring blooms is probably far from your mind! However, fall bulb care and planting is a small, but important, task on your fall landscaping “to-do” list that can make a beautiful impact statement for your home. So, what do you need to consider when planting fall bulbs and how do you go about it? Read on to learn more!

What are bulbs, and why should we plant them in the fall?

Simply put, a bulb essentially stores and feeds a developing flower as it grows to maturity. They have the capability to store food and nurture themselves through adverse conditions, like cold winters, and require a restful dormant period to develop. Planting bulbs at the right time in the fall will ensure that they’re settled in for that dormant period, will establish roots, and will sustain themselves until spring growth begins. Common bulbs for our area are tulips, daffodils, hyacinth, allium, and iris.

When should we plant fall bulbs?

Fall bulbs should be planted when the ground temperature is 55 degrees or cooler. Typically, here in Wisconsin, that means starting in late September or early October. Waiting until its cool enough is very important; planting when the soil is too warm can encourage your bulbs to produce tender top growth. Plant anytime through early-mid November, as long as the soil can be worked.

Where should bulbs be planted?

Bulbs will thrive best in a sunny space, allowing them to soak up as much of the warm spring rays as possible. Make sure the location gets 4 hours or more of light per day, and plant in an area that has good drainage.

What is the best way to plant bulbs?

Plant your bulbs pointed side up (when in doubt, plant the bulb on its side… it will find its way up!). As a rule of thumb, plant about 3x as deep as the height of your bulb. This can give you the opportunity to plant many bulbs in one area. For example: you can layer a small bulb like hyacinth on top of daffodils… you could even plant allium below the daffodils, ensuring a long season of spring/early summer blooms. In fact, planting multiple bulbs in a large hole creates a beautiful mass of flowers come spring.

Ongoing Care

Fertilize your bulbs at the time of planting, and again when growth emerges in the spring.

After the blooms are finished, don’t cut back the plant’s foliage until it becomes yellow and wilted. The plant will take energy from its healthy foliage to help nourish the bulb for future blooms!

As always, reach out to our talented and knowledgeable team members with any questions! We’re always here to help you dream, build, and nurture your outdoor haven!

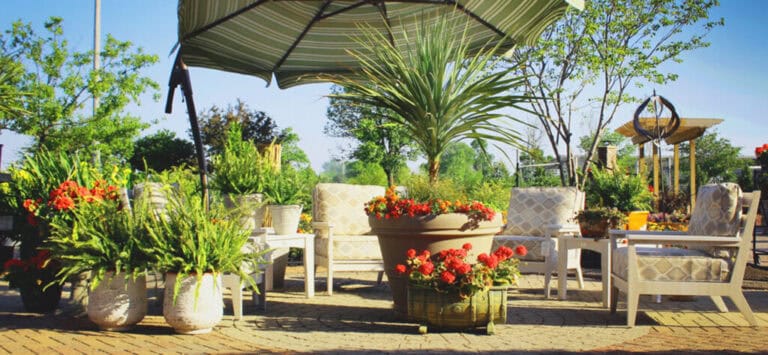
What’s the Deal with Poly Furniture? Top 8 Things to Consider when Buying!

Polyethylene furniture (or “poly” as it is more often called) has quickly taken the outdoor furniture market by storm. Adirondack chairs, dining sets, lounge chairs, and even fire tables are now being made with the stuff. Why? Because it’s awesome.

What is polyethylene?

Polyethylene is a man-made plastic usually made from recycled materials. It is used in a variety of different items such as tubes, plastic parts, laminates and even furniture!

What are the benefits of poly furniture?

Poly furniture comes in a huge range of colors and is colored all the way through. This means that (with the exception of a few colors) there will be very minimal fading and any nicks or scratches will barely show! Depending on the manufacturer it is typically very heavy, so you do not have to worry about it blowing across your patio when the wind picks up. Lastly, it can be left outside year-round (even in Wisconsin snow), so you do not have to worry about dragging it inside at the end of the year. All in all, poly furniture is incredibly low maintenance, long-lasting, and a great addition to your outdoor space.

What should you pay attention to when buying poly furniture?

  1. Comfort. When buying poly furniture, you definitely want to sit in the exact chair or one very similar because each style and manufacturer will have slightly different designs. If you want to enjoy your furniture in your backyard, do not buy it without test driving it!
  2. Structure. Better quality poly furniture will be shaped for comfort and have more boards. The frame will also vary between manufacturers. Some, such as Berlin Gardens, will have fully welded aluminum frames while others will have cheaper and lighter frames that are not fully welded.
  3. Density. In addition to the structure, stronger and heavier boards are less likely to warp. A classic Adirondack chair from Berlin Gardens weighs 65 pounds and is composed primarily of recycled milk jugs. There are 10 milk jugs per pound of product, so one Adirondack chair is made up of about 650 milk jugs.
  4. Hardware. Is the hardware clearly visible or is it primarily tucked in places that are not visible? What type of hardware do the chairs use? Berlin Gardens uses marine grade alloy chrome plated stainless steel.
  5. Finish. Some poly companies will offer different finishes such as standard and natural. Standard finish is going to be smooth and a little bit glossier. If this is the look you’d prefer, you definitely should pay attention to how smooth it feels when comparing manufacturers! On the other hand, many companies offer a natural finish option. This is going to look more like wood and have a much richer appearance.
  6. Color. In the hot summer sun, poly furniture can get warm. If you have a patio that you know will be right in the hot sun, you may want to consider a lighter color that will stay cooler throughout the summer!
  7. Warranty. Good products have good companies that stand behind their products. Buying furniture is an investment and you want it to last! For example, Berlin Gardens poly comes with a 20-year warranty and they have outstanding customer service.
  8. Manufacturer. Where is the furniture produced? The manufacturer has a lot to do with the smoothness, construction, and overall quality of the product. Berlin Gardens is proud to be made by an Amish workforce in Berlin, Ohio.

If you want low maintenance furniture that is built to endure Wisconsin weather and last you a very long time, poly furniture could be the perfect solution. Stop by Vande Hey Company today or check out Berlin Gardens and our other furniture lines here.

Landscaping Management 101: September

As we enter into September, the heat of summer will finally begin to diminish as we enjoy cooler evening temperatures. The cooler temperatures create a great opportunity for some transplanting, sowing grass seed, and utilizing various herbicides as we continue to enjoy harvesting various fruits and vegetables. Let’s dive into our September Landscape Management 101.

EARLY SEPTEMBER

  • Divide spring and summer-flowering perennials.  These include peonies, daylilies, irises, oriental poppies, phlox, and many others. However, if the plant is currently blooming then it should not be divided.
  • September is a great time to plant evergreen trees!
  • Trim “Bleeder” trees such as Birch, Maple, and Elm.
  • Control broadleaf weeds in the lawn with appropriate application. Either spot treat or apply weed and feed products.
  • Seed bare spots in lawn, sow lawn seed, and/or install sod.
  • Plant spring-flowering bulbs (Tulips, Daffodils, Crocus, Hyacinth).
  • Take cuttings of shade-loving flowering annuals and herbs for growing indoors throughout the winter if desired.

MID SEPTEMBER

  • Bring house plants back indoors. Keep an eye out for insects! One way to minimize insects is to give the plant a good blast of water before bringing it inside.
  • Continue to plant spring-blooming bulbs.
  • Aerate lawn if desired to smooth out bumpy lawns, allow air and moisture to penetrate root zone, and breakdown thatch layer.
  • Harvest tender vegetables before frost.

LATE SEPTEMBER

  • Many late apple varieties can be harvested.
  • Harvest dahlias and other summer bulbs after a killing frost – when plants turn black.
  • Collect dried flowers for fall arrangements.
  • While most trees will not start losing leaves quite yet, make sure to rake up and remove any leaves affected by fungal or bacterial diseases.

As always we are here for you! Stop by with your questions or to pick up necessary fertilizers and herbicides today!

Buying a Fire Table? Consider These 8 Things!

The demand for fire tables has escalated greatly in recent years due to their function as a patio centerpiece that creates both ambiance and warmth. They are quickly becoming the next “must have” for anyone with a backyard patio. Yet, there are many different price points, styles, and options. How do you choose? Here are our top 8 things you should consider.

  1. Location. With any fire feature you will want to start by considering the location. Is it a straight-lined patio or free-flowing? How much space do you have? Will you move the table? If it is something that will move around, you may also want to consider a lighter material. A table too large for your space may result in guests falling off the patio while a table too small will leave an awkward amount of open space. You should also consider how many people will typically be sitting around the table. Are you sitting on one side overlooking your backyard or are you looking to wrap people around a circular table?
  2. Functionality. How are you going to use the table? Most fire tables will include or have an optional burner cover. Do you plan to dine on the table or use it to play cards? If you are looking to dine, you could even get a dining table with a fire feature. If you are looking to have people stand around and chat, you may want to consider a higher fire table that people could comfortably place drinks on or lean up against. If you are looking for a cozy atmosphere, you may instead want to consider a fireplace. A fireplace can cozy up a patio while also providing more height and possible protection from wind.
  3. Material and Style. Fire tables come in a huge variety of materials such as polyethylene, aluminum, granite, stone, and wicker. Consider the durability of the material, whether or not it will fade, and the atmosphere you are striving to create. For example, a wicker table will often create a more tropical feel while a sleek glass or granite top will appear much more modern. When buying you should also pay attention to little details such as what type of stainless steel is used for the burner. 
  4. Fuel Source. The most common fuel sources are wood, propane, and natural gas. While the natural crackle and smell of wood is awesome, it is also messier. Natural gas removes the burden of replacing a propane tank, but it requires a gas line and removes mobility. Propane is the most popular fuel providing mobility and also a clean burn.
  5. BTU Output. British Thermal Output refers to the heat that the flame will provide. Higher BTU means more heat. Many tables allow for flame (and thus temperature) adjustment. While varying levels of adjustability exist, having the ability to create ambiance without too much heat on a warmer night or large flames on a cool night is worth the cost of an upper-end fire table.
  6. “Fire Media.” Fire media refers to what is inside the burner. Most fire tables come with clear tempered glass stones, but you could also add lava rock, gas logs, and different colored gems or crushed glass. Utilizing different fire media can create a more unique feel and provide another opportunity to tie the fire table into your existing landscaping.
  7. Safety and Durability. While safety restrictions are increasing, it is a good idea to consider the safety standards of the tables that interest you. Look for tables that are safety tested and listed by UL LLC. This will ensure the table has safety features such as shutting off when the flame is put out by extreme wind. Many tables made overseas are less likely to follow these safety precautions. Another element of safety is durability. Look for companies that offer a warranty and stand behind their products.
  8. Price. Whenever you make a purchase, you should consider the price and have an idea of your budget. While a fire table can be a large investment, spending a little bit more up front will provide much greater quality, longevity, and overall satisfaction. Budget wisely, but make sure you know what you are buying when you make an investment!

Whether you know exactly what style you want or you need to explore the options, our knowledgeable staff is here to help you bring home the perfect fire feature for your patio. Stop in to our showroom, take a look at our website (https://www.vandeheys.com/services/retail/fire-tables/) or give us a call to take the next step in perfecting your backyard haven.

The ‘Ferrari of Grills’: What’s the Deal with the Big Green Egg?

Most people have at least heard of the Big Green Egg (BGE). The signature green color and egg shape make it unique amongst all other grills but the appearance is just the beginning of what makes the BGE the ‘Ferrari” of grills’. Simply stated, the BGE stands alone as the highest quality and most versatile outdoor cooking product on the market. Here’s why…

Versatility. The BGE is a grill, roaster, smoker, and an oven all in one that can be used year-round. Whether you are smoking at 200°F for up to 18 hours, baking at 350°F, or searing steaks at 750°F the BGE can do it all. With the BGE there is also no need for rotisserie because it cooks evenly from all four sides.

Unrivaled Results. Not only does the ceramic core make the grill incredibly efficient but it also holds moisture and flavor in your food unlike any other grill.  The BGE lump charcoal made from 100% natural oak and hickory sourced in the USA provides natural flavor without the use of harmful chemicals and lighter fluid.

Precision Temperature Control. BGE’s patented air flow systems allow precise temperature control from 150°F to 750°F. The unique shape cooks perfectly evenly while holding a constant temperature.  With EGGGenius you can also control your grill temperature and monitor your meat by degree directly from your phone.

EGGcessories. Punny, we know, but with BGE you will have an extensive line of accessories from baking stones all the way to pigtail flippers. These professional grade add-ons will enhance your cooking experience and make you look like a backyard hero while the EGG does all the real work.

Low Maintenance. BGE’s unique green glaze stands up to the elements and wipes off easily without the addition of chemical cleaners. Every few cooks EGGcessories such as the Stainless-Steel Fire Bowl and Ash Tool make it easy to clean out the small amount of soot that collects in the bottom.

Lifetime Warranty. Your investment in an EGG is protected by a successful company with a worldwide reputation for unmatched customer service. You will never need or want a new grill again (unless of course you want a second EGG).

If you are still unsure about the EGG, sign up for a grill class and experience the results yourself. You will be glad you did.

“The Ultimate Cooking Experience” is right here at Vande Hey Company. Stop by today and ask our EGGsperts about the Big Green Egg to see for yourself.