All posts by vandeheyretail@gmail.com

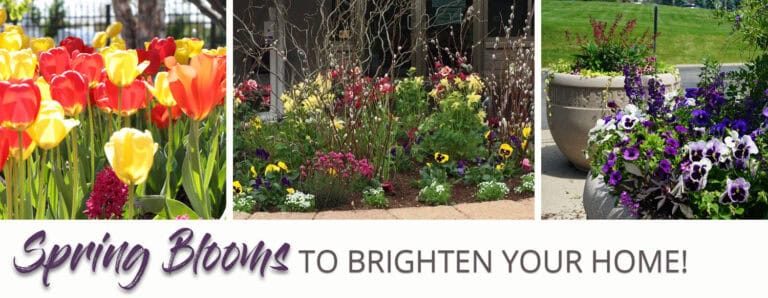
Cool Weather Blooms to Brighten Your Home!

We’ve reached that unique time of year when the sun begins to warm our daytime hours, but the ground is still cool and the nights downright frosty (literally). And chances are, your beautiful winter container arrangements are beginning to look…. well… a little crispy. Its the time of year that makes us all eager for fresh life and colorful blooms. But how early can you plant spring containers and what, exactly, is available to use? Read on for spring planting guidelines and our favorite cool weather blooms!

Cold tolerant annuals are those flowers that prefer cooler temperatures, and tend to slow or cease blooming once the temperatures rise to a consistently warm level. That said, care must be taken not to put them out too early. Most hardy annuals can tolerate a light frost, but not freezing. Typically, here in Wisconsin, that means that mid-April is the standard go-to time for planting spring flowers. And, although you may not think it, there are plenty of gorgeous annuals that can bring interest, texture, and a burst of color to your front door. Here are a few of our tried-and-true favorites:

  1. PANSIES

Chances are when you think of early spring flowers, Pansies are one of the first to come to mind. Their wide range of vibrant color, reliable and extended blooming period, and tolerance for temperature drops make them a classic staple in spring plantings. Pansies will love full to partial sun during the cooler spring months, but will prefer a shadier location as summer approaches and the sun begins heating up. At approximately 7″ tall and boasting bright, cheerful colors, Pansies will make a great focal point in your planters. Keep Pansies evenly watered and remove dead or faded flowers to encourage more blooms to grow and extend the plants’ season.

Fun fact about Pansies: Pansies are a symbol of love and affectionate thoughts. In Victorian England, people gave them as gifts to express romantic feelings.

2. SNAPDRAGONS

Bring a beautiful element of height and color to your spring planters with Snapdragons. Coming in just about any color you can think of, Snapdragons have a lovely vertical shape and a long bloom cycle that will keep your planters looking top notch throughout the season. The flowers will begin from the base of the stem, working their way upwards. You can snip off the top of the stems for a fuller look, or keep their natural shape to bring an elegant height to your planter. As Snapdragons prefer cooler weather, you will see them slow or cease blooming during the hotter months. However, if you move them to a partially shady location and keep them well-watered, they can re-bloom in the fall season.

Fun fact about Snapdragons: Snapdragons got their name because the flower resembles a dragon’s face. When the flower is pressed gently on the sides, its mouth can open and “snap” shut.

3. SWEET ALYSSUM

With an abundance of delicate flowers, full foliage, and soft colors, Sweet Alyssum is the perfect trailing element for your spring planters. Growing to only about 5″ height, its white or lightly-colored hues will perfectly offset bolder and taller elements like Pansies and Snapdragons. Sweet Alyssum will spread and trail, and can also be a great choice for edging your beds. As the summer approaches and the weather heats up, shear them by about 2″ to encourage new growth and move them to a partially shady location. Don’t be fooled by their delicate appearance – Sweet Alyssum is a hardy, drought-resistant grower!

Fun fact about Sweet Alyssum: With a subtle honey scent, they are a favorite of pollinators and can provide a welcoming aroma to your home and yard.

4. DIANTHUS

In pink, rose, lavender, and bi-color hues, Dianthus is a pretty, bright addition to any spring planter. Growing in a mid-range height, it’s a wonderful choice to include in the body of your arrangement for a delicate, yet colorful, touch. Dianthus is a hardy, tolerant plant that can bloom through light frosts. Much like other cool-weather flowers, they will slow or stop flowering as the summer heats up; cutting them back by about 1/3 of their height will encourage them to bloom again come fall.

Fun fact about dianthus: ‘Dianthus’ comes from the Greek words for ‘of Zeus’ (‘dios’) and ‘flower’ (‘anthos’).

5. DUSTY MILLER

Dusty Miller’s cool, silver foliage and velvety texture is the perfect compliment to offset the colorful blooms in your spring planters. In addition to their attractive appearance, its lacy leaves are also deer, drought and disease resistant, making it a popular addition to containers and landscape beds alike. Dusty Miller loves a sunny spot and, unlike many other cold-tolerant annuals, can carry on an attractive grow period through the summer months (although summer trimming is encouraged to keep it from looking too leggy).

Fun fact about Dusty Miller: Even though its best-known as a foliage plant, Dusty Miller does produce small clusters of yellow flowers in the summer.

In addition to flowers, spring is a fantastic time to incorporate additional elements into your planters. Think about bringing height to your arrangement with curly willow or pussy willow stems. Bring interest to the base and body of your planter with moss or vine balls, colored Spanish moss, or even colorful Easter eggs.

Our team is ready to help you create a stunning, successful spring arrangement. Stop in to our Spring Open House on Saturday April 24 (8-5) to select spring annuals, accessories and containers. Our Potting Shed will be open and our design team will be on hand to help you plant a show-stopping arrangement! Click here to check out the event on Facebook! Or follow this link to sign up for one of our one-on-one spring container workshops – you’ll be able to work with one of our garden center designers to select material and create your own custom container.

We look forward to helping you learn about, design, plant and enjoy a landscape that you and your family will be proud of all season long. Happy Spring from all of us at the Vande Hey Company!

Spring Gardening: When to Dig In

Here in Wisconsin, the spring season can be a bit of a tease. Just when you think it must finally be here for good, you wake up one April morning to find your lawn covered in a fresh blanket of snow. After a long winter, though, most of us can’t wait to get out into the yard, dig our hands into the soil, and start watching seeds grow into luscious crops. Whether you’re a first time gardener, a new homeowner, or a longtime hobbyist, you may find yourself wondering: Isn’t it time to get started?! The good news is: Yes! Our team of gardeners and horticulturists teamed up to share a few rules of “green thumbs” and gardening tips!

AVOIDING KILLING FROSTS

The biggest concern with planting many vegetables and annuals is the occurrence of killing frosts. A general rule of thumb in our area puts safe planting dates around Memorial Day for most years, give or take a week or so. This is an average date; meaning, the likelihood of a killing frost happening after that is rare but, as we all know, can certainly still happen. If you’re looking for a more specific answer, there are web resources to help. You can even find sites that will give you planting recommendations based on your zip code!

SEEDS TO PLANT FIRST

Luckily, there are many frost-tolerant vegetables that can be planted earlier than what we just discussed. These include onion, lettuce, arugula, parsley, spinach, radishes, carrots, parsnips, cabbage, kale, collards, brussel sprouts and broccoli. They actually enjoy the cooler temperatures of early spring and will begin germination when the ground is over 40 degrees. Seeds will fare better than transplants; if you start any of these vegetables in the house before planting, you’ll still want to wait a couple of weeks later than the seeds before putting them in the ground.

SEEDS TO PLANT NEXT

The majority of typical vegetables should be planted after the risk of killing frosts. These include corn, squash, tomatoes, peppers, eggplants, okra, melons, cucumbers and beans. They will be most successful when the ground has warmed enough to retain its temperature during any weather swings. Expect these seeds to shoot up within about a week’s time. If you’ve started any of these vegetables indoors, wait about another week before planting the transplants to ensure the soil and night temperatures are adequately warm.

You’ll still want to keep an eye on the weather, and cover plants with a blanket on nights that hold a risk of frost. Typically, the most damage can occur on cold, clear and windless nights.

STARTING SEEDS INDOORS

Some of the best seeds to start indoors are early transplants, like cauliflower, brussel sprouts or cabbage. Because they take a longer time to mature, they’re a great choice to get a jumpstart on early in the season. Other easy plants to start from seeds are: tomatoes (sown indoors about 6-8 weeks before the last frost), watermelon (4-6 weeks before the last frost), peppers (8-12 weeks), herbs (6-8 weeks), and lettuce (8 weeks).

There are, however, a few plants that shouldn’t be started indoors. Root vegetables (like carrots, radishes, potatoes, and beets) don’t transplant well because damage to the roots will lead to a poor harvest. Squash, cucumbers and beans typically grow rapidly, making them difficult to transplant and easy to damage in trying to do so.

Here at the garden center, we can’t wait to start watching those first vegetables pop up out of the ground, too! Stop on in to pick up your seeds and speak with one of our horticulturists to learn more about successful gardening in our area. We wish you the best of luck in your growing season, and hope to see you soon!

5 Ways to Start Gardening Sustainably

The term “sustainable gardening” may sound daunting at first, but it really boils down to a simple concept: enhancing your space while choosing methods that cause little harm to it. Concern for our environment and the desire to protect and preserve our world for future generations has prompted us to learn, explore, and implement sustainable practices in many aspects of our lifestyles, and landscaping should be no different. There are many ways to bring a bit more “green” to your yard, and we’ve got five easy tips to help get you started!

COMPOSTING

Composting creates nutrient-rich soil with re-purposed organic material, meaning you’ll be improving the size and quantity of your produce, promoting bigger flower blooms, and cutting down on the amount of garbage being sent to the landfill. To get started:

  • Begin with a closed bin about 3′ in size in your yard (you may want to put up a chicken wire fence around it, as well).
  • Compost yard waste, such as leaves and grass clippings, and most kitchen waste (even egg shells, coffee grounds/filters, newspapers, tea bags, toothpicks, and hair!)
  • Avoid composting dairy products, animal products (including bones and fat) and pet waste. These can attract unwanted animals and create unpleasant odors.
  • Equally balance “green waste” (like fruits and vegetables) with “brown waste” (dried lawn clippings, leaves, newspapers). Your compost shouldn’t be sopping wet (and smelly) or very dry; aim to maintain a moist, soil-like texture.
  • Turn with a shovel every week or two.
  • When compost resembles soil, it can be sprinkled and worked in to your gardens!

We compost here at Vande Hey’s, too! Our compost is made from locally-obtained yard materials such as leaves, grass clippings, and garden waste.  Once on our site, the materials are left to break down naturally, usually over 24 to 36 months. The material is turned as often as possible to aid in decomposition and to ensure as much material is broken down as can be. When the yard waste materials are sufficiently broken down, we bring in a shredder to mix in sand and pine fines to firm-up the compost and keep it from becoming overly saturated. Our final blend is about 10% sand, 10% pine fines, and 80% broken-down organic yard waste materials. This blend gives the soil an ability to retain moisture as well asensures adequate drainage. This compost can be purchased at our retail center, as well!

INCORPORATING NATIVE PLANTS

Native plants refer to those that grow naturally in an area, and they hold a vital role in supporting regional wildlife and habitats. Native plants are generally low-maintenance, as they’ve evolved to the area’s climate, soil, moisture, and pest resilience. Because of this adaptation, they generally require much less water and minimize flooding. They also play an important role in supporting your local wildlife! Many native plants provide seeds and nuts for local animals or nectar for pollinators like bees, birds, and butterflies. Try incorporating a few of these favorite native plants in your yard:

  • Columbine: With pretty, vibrant red flowers, this plant is a hummingbird favorite
  • Bee Balm: This plant blooms in various shades of purple, supports a variety of birds and insects, and is a great plant for beginners
  • Aster: An attractive late summer/fall bloom, these plants also support pollinators and are flexible to soil types
  • Wild Geranium: These plants have delicate purple flowers, are flexible to soil and light levels, and pollinator-friendly
  • Butterfly Weed: With bright orange flowers, these plants are excellent for monarch butterflies

MULCHING

We all know that freshly mulched beds are an attractive, effective boost to your home’s curb appeal. But did you know it plays a big role in supporting a sustainable yard? Mulch serves many different purposes, from holding moisture in the soil and maintaining a consistent ground temperature to giving plants a higher survival rate and adding visual interest to your landscape. Because bark mulch is a natural material, it will decompose, leaving behind a nutrient-rich compost that aids in plant growth. Click here to check out our variety of available mulches!

PLANT TREES

Whether it’s fall colors or beautiful spring blooms, trees bring beauty and value to your yard in numerous ways… and they’re a key component in sustainability! Here are a few reasons why:

  • Combating Climate Change– Absorbing carbon dioxide, storing the carbon, and releasing oxygen back into the air, trees do some heavy lifting when it comes to helping out mother nature!
  • Cleaning the Air- Reducing the greenhouse effect and filtering toxins, trees absorb many pollutants and help keep our air clean.
  • Keeping Things Cool- Trees literally keep things cool by offering shade and releasing water vapor into the air through their leaves, cooling temperatures from 2 to 9 degrees. Trees, especially those on the west side of your home, can also help save on your summer cooling costs by providing shade during the hottest part of the day.
  • Preventing Erosion- Trees extensive root systems can help hold soil in place and slow runoff.
  • Supporting Wildlife- Trees provide protection and homes for birds, bees, squirrels and a variety of other species.

RAIN BARRELS

Rain barrels are a simple addition to your home that can really benefit sustainability, as well as your wallet! You can reduce your water bill during the summer months by saving hundreds of gallons of water for garden care, watering flowers, and washing cars. Its also beneficial for plant and soil health: rain water has more oxygen and less salt, chlorine and flouride in it.

Setting up a rain barrel is an easy task! First, make sure you select a spot that’s easily accessible (close to your plants, garden, or patio) and a level surface. Also, you’ll need to make sure its located by one of your home’s downspouts. If you prefer to use a rain barrel with a spigot (rather than just scooping the water out), you’ll probably want to raise it up (cement blocks work great) to make it easier to fill watering cans. Use a flexible downspout to connect the top of your downspout to the rain barrel. You’ll also want to consider adding an overflow hose leading away from the barrel so that any overflow doesn’t empty out right next to your foundation. Finally, you may want to add a screen over the top to keep bugs or other critters out.

As you design your yard, garden, or even seasonal container plantings, keeping sustainable practices in mind is an impactful benefit to our environment. At Vande Hey Company, we are excited to expand, educate and share our knowledge with you! Stop in to discuss native gardening, tree options, or any other sustainable practices with our team – we’re happy to help!

Garden Trends to Dig Into This Year!

Spring is nearly here and we can’t wait to get back outdoors! 2020 brought with it a huge surge of interest in gardening, outdoor living, and other home-related activities. In 2021, we’ll see the influence of this evolving appreciation as we dig back in to the spring season!

  1. Exploring Sustainability

Sustainable gardening is the idea of using practices that cause little harm to the earth and its inhabitants while attempting to actually enhance it. Concern for our environment and the desire to protect and preserve our world for future generations has prompted us to learn, explore, and implement sustainable practices. The good news? Its easy to do! Try these simple tips to make your yard more sustainable:

  • Conserve water by planting drought-tolerant and native plants.
  • Compost food scraps like vegetable and fruit waste, bread, egg shells, coffee grounds and filters, tea bags, used paper towels, and more! Start a bin, and use the finished compost on your garden and beds for rich soil.
  • Make sure your beds have adequate layers of mulch to save water, decrease weeds, limit erosion, and increase nutrients in your soil.
  • Plant trees on your property for shade that naturally cools your home in the summer months.

2. Creating a Garden Getaway

With all of us spending more time at home, the appeal of investing in our own outdoor haven is greater than ever! Creating a comforting space to relax, enjoy time with your family, and relieve the stress of the outside world is a healthy way to re-center your mind, slow your heart rate, and calm your senses! Consider these ideas as you start planning:

  • Think about the soothing benefits of sound. Perhaps a water feature will provide a calm presence and cancel outside noise. Or you may want to include bird-friendly flowers and feeders to attract songbirds to your space.
  • Nothing beats the warm touch of sun, but its easy to overheat in the middle of summer. Make sure you have a shady spot to relax, as well! If you don’t have a mature tree in your yard, consider options like a patio umbrella or pergola.
  • Maintain privacy and quiet while keeping a soft, natural appearance by incorporating privacy hedges.
  • When selecting furniture, assess your habits and priorities. Is lounging around an evening campfire your favorite way to relax? Do you eat family meals outside whenever possible? Evaluating your needs ahead of time will help make the process of selecting furniture a simpler one!

3. Family-Friendly Gardening

Introducing kids to gardening at any age is a wonderful opportunity to spend quality time together and share values. Plus, you’ll have a bounty of delicious, home-grown meals to enjoy as a family!

  • Let kids help pick out what flowers and vegetables to plant
  • Start seeds indoors for a fun spring project, then watch them grow and care for them until its time to transplant
  • Get your kids their own inexpensive garden tools like gloves and trowels
  • Read and learn about gardening and cooking together
  • Let them help plant, tend, weed, water, and harvest. Its a great way to teach responsibility while enjoying hobbies together!

Check out our upcoming Young Gardener’s Day event on March 20th, filled with family-friendly gardening ideas and activities!

4. Container Plantings

A quick, effective way to bring color and curb appeal to your home is by incorporating decorative containers filled with seasonal plantings. Whether you prefer bold, bright tropicals or an elegant palette of monochrome hues, your home will be sure to look beautiful and welcoming. Plant your own for a great family project, or reach out to learn more about our Color 365 services!

5. Growing Your Own Food

Interest in home gardening is surging! There’s a special joy in growing food, even if you don’t have room for a large, traditional garden. Try raised bed or container gardening (perfect for tomatoes, herbs, and small vegetables) or even mixing edibles into your existing flower beds. If you’re limited on space, consider planting high-yield plants like tomatoes, peppers, cucumbers, and peas to get as much out of your space as possible. Finally, stop in to pick up your seeds early – they’re selling fast this year!

6. Houseplants

Whether they’re brightening up your living space or rejuvenating your home office, houseplants are hot in interior design right now and rightfully so. Not only do they look attractive, they also improve air quality and lift your mood! Check out a few of the benefits of including these attractive accents in your home:

  • Reduce stress levels
  • Ease depression, anxiety, and Seasonal Affective Disorder
  • Boost productivity
  • Improve indoor air quality

Stop in to our garden center to check out our wide selection of interior plants, pair it up with one of our fun containers, and bring an instant pop of color and interest to your home or office!

7. Outdoor Living

Have you heard of the Norwegian concept of “friluftsliv”? Pronounced free-loofts-liv, it means “open air living” and encourages a lifestyle of plenty of fresh air, unwinding outdoors, and simply understanding the healing effects of nature. An important lifestyle for all ages, its particularly crucial for children: studies show that kids who spend ample time outdoors have increased creativity and critical thinking, better behavior and test scores, and a stronger sense of purpose. So take a walk outdoors, enjoy a meal on your patio, and embrace the fresh air!

As always, our team of dedicated horticulturists, designers, and gardening specialists are here to help you with any questions or concerns you may have. Reach out to us at 920.788.6344 or stop in to our garden center.

Whether you’re just starting your landscaping hobbies, a first time home owner, or an avid, lifelong gardener…. we wish you a happy and bountiful 2021 season!

Landscaping Management 101: November

Beautiful autumn days mean comfortable working temperatures and hopefully time to continue prepping for winter. The more you do now, the easier things will be in the spring! Put things away, organize, protect, and enjoy the remaining fruits of your hard labor throughout this past year!

EARLY NOVEMBER

  • Deciduous trees, shrubs, and spring bulbs can be planted until the ground freezes.
  • Keep fallen leaves from piling up on your lawn.  This will prevent smothering this winter.
  • Outdoor planters, baskets, etc. should be emptied and washed before storing for next year.
  • Mulch in roses with 8 to 10 inches of soil or shredded bark. 
  • Water all evergreens before the ground freezes to keep them from drying out over winter.
  • Spray plants with repellents to protect them from rabbits, deer, and mice.
  • Harvest cole crops as long as possible since they are made sweeter by frost (Common cole crops include broccoli, Brussels sprouts, cabbage, cauliflower, collards, kale, and kohlrabi).

MID NOVEMBER

  • Cut the lawn short (2-2.5 inches) once the leaves are off the trees to discourage snow mold and mice tunneling.
  • Protect strawberries with a 6-inch layer of clean, loose marsh hay. (We use marsh hay because it contains fewer weed seeds and stays “fluffier.”)
  • Protect tender perennials with a 2 to 3 inch layer of fresh balsam boughs.
  • Protect tree trunks from pest damage by surrounding with plastic or wire 1-2 feet higher than expected snowfall.

LATE NOVEMBER

  • Stop fertilizing houseplants since they will use less water and nutrients due to lower light levels.
  • Move pesticides and equipment to a place where they will not freeze.
  • Wash off garden tools and dry completely when storing for winter. Use a rag dipped in oil to wipe down metal parts of tools. Wipe down wooden parts with linseed oil to keep the wood from drying out.
  • Cover cole crops to prevent them from freezing solid.
  • Cut down and discard asparagus stems and leaves that have yellowed to reduce disease and insect issues next year.
  • Enjoy Thanksgiving Dinner – the fruits of your labor.

Houseplants: Brighten Your Home… and Your Mood!

The weather is cooling and, for many of us, we find ourselves moving increasingly toward indoor hobbies and activities. If you’re an avid gardener, though, this can be a tough transition that leaves you itching to dig in the soil, quietly nurture your garden, and watch your plants grow and thrive. A growing trend in home decor (and rightfully so) has been houseplants: they’re a perfect way to get your gardening fix, and bring a wealth of health benefits to your home!

Did you know that including living plants in your home’s decor improves your air quality, minimizes headaches, reduces fatigue and eases dry skin during the winter months? Additionally, for anyone struggling with SAD (Seasonal Affective Disorder) houseplants can improve your mood, relieve stress and anxiety, and provide a calming effect through tangible interaction. All of these benefits come down to one simple concept: biophilia. Simply put, plants make us feel good! When we are out in nature, surrounded by plant life, or just in a room with living plant material, we are more happy, content, and relaxed. All the reason to introduce a bit of fresh greenery to your home! Houseplants are becoming increasingly popular and there are more varieties available than ever before. Below is a quick guide to a few of our favorites; be sure to stop in to our garden center to check these out in person, along with a wide selection of other varieties, and bring that positive biophilia home with you for the long winter!

  1. Pilea- Pilea peperomioides is an easy to care for, cute little plant that’s been growing in popularity quickly. Native to Asia, its generally considered to be an easy-going plant, preferring medium to bright indirect sunlight. Water your pilea every one to two weeks, depending on how bright of light its in, and making sure it dries out in between waterings. Dry, curled leaves indicate too little water, while yellow leaves and black stems indicate too much. Your pilea will also produce “pups” or “babies” on its own, which will pop up in the surrounding soil!

2. Spider Plants– A long-time houseplant staple, spider plants are making a comeback in the design world! These hardy hanging plants aren’t fussy, and can survive in a variety of conditions. A perfect spot for your spider plant is in bright, indirect sunlight, but they can tolerate a lower light setting, too. Water well during during the summer months, then cut back through the winter and mist occasionally year-round. Spider plants prefer fast-draining, well-fertilized soil, particularly during the summer months. Make sure to watch out for pests, though: spider mites, mealybugs, aphids and whiteflies can be attracted to spider plants!

One of the fun and unique attributes of this plant is how easy it is to propagate. Simply remove one of the small plantlets and place it in soil, then watch to ensure that it grows roots. Its a quick and easy gift, and one that’s easy to care for!

3. Croton– With its colorful foliage, the croton is a gorgeous accent plant for your home. Your croton will do best in a sunny location, with regular misting. If you notice that its new growth is dull in color and vibrancy, move it to a sunnier spot: this is a sign that its not getting enough light. Keep the soil evenly moist but not wet, and allow to dry a bit in between waterings. Crotons tend to attract dust, so you’ll want to wipe its foliage with a damp rag occasionally!

4. Zamia-Fully named “Zamioculas Zamiifolia” and often referred to as “ZZ”, this popular houseplant has a modern look and is easy to care for. The Zamia plant can tolerate low to bright, indirect light levels, and prefers to dry out in between waterings. Its a perfect plant for beginners, and is very forgiving if you forget a watering or two! The Zamia’s foliage can be considered toxic, though, so you’ll want to keep it away from curious pets or small children.

5. Sansevieria- Often called “Snake Plant” or “Mother-in-Law Tongue”, this hardy houseplant is one of the easiest to care for and, with its vertical shape, one of the easiest to incorporate into your space. Sansevieria will thrive best in bright light, but are well known to tolerate dim rooms with very low light, too. These plants prefer to dry out in between watering; one of the most common mistakes, in fact, is overwatering and root rot. As your sansevieria grows, you’ll want to continually rotate it to ensure that it is growing evenly (they tend to arch toward the light, so you can end up with a heavily leaning plant!). Sansevieria come in many varieties and sizes and tend to be slow growing, making them a great fit for just about any home or office!

Stop in at our garden center to check out these outstanding houseplants, plus plenty of others! Our knowledgeable staff is here to help you select the perfect plants for your needs and get you started on the right foot!

Do I Really Need a Thermal Blanket for My Pellet Grill?

If you have purchased a pellet grill, you have most likely asked yourself if it is worth the extra investment for a thermal blanket, especially when you still need a regular cover, and you just purchased an expensive pellet grill. Here’s your short answer—yes. It will save you time and money and pay for itself!

How does a thermal blanket work?

A thermal blanket is essentially a cover for the grill that insulates the grill cavity while you are cooking. By holding in heat that would otherwise escape, the grill runs more efficiently saving you pellets, time, and money.

At about 60°F with no wind and no food on the grill, a Green Mountain Grill will burn through about 1.2 pounds of pellets per hour at 350°F. With a brisk Wisconsin wind, cold temperatures, and food on the grill you can burn through pellets at more than double that rate. You might even have some trouble getting up to your desired temperature. Now you are burning through pellets, waiting longer for your grill, and definitely struggling to control your temperature. Adding a thermal blanket may not be necessary in warm climates, but here in Wisconsin it is huge for minimizing these challenges.

Benefits of a thermal blanket.

·    Save up to 50% on pellets. While this number will be on the higher end during colder seasons, you will almost always see some sort of benefit. This is truly the biggest benefit and the area where you will save the most money.

·    Reach higher temperatures faster. During cooler seasons, your pellet grill may take a long time to get up to temperature or it may never reach your desired temperature. With a thermal blanket, you will decrease your startup time and have more success with the higher temps.

·    Regulate temperature. With less wind and heat escaping, your grill will be able to more efficiently regulate the temperature and lead to better results.

·    Grill year-round! Cold weather? No problem. PRO TIP: If it is REALLY cold, try tucking your grill somewhere out of the wind and make sure to wrap it up with a thermal blanket.

Even when it is not the dead of winter, a thermal blanket will save you money by increasing your grill’s pellet efficiency. With a thermal blanket, you will be grilling delicious food year-round without paying astronomical amounts for pellets. Happy grilling.

Landscaping Management 101: October

Winter is coming! Living in Wisconsin, we are accustomed to winter showing up early so, whether we like it or not, it is time to start preparing. Even light frosts can pose dangers for more tender plants like your begonias, tomatoes, and peppers. Be prepared ahead of time so you do not get caught off guard!

EARLY OCTOBER

  • Store bulbs of summer-flowering tender perennials (cannas, calla lily, begonias) if you haven’t already.
  • Spot treat broadleaf weeds. This is most effective after the first light frost or multiple nights in a row with temperatures into the 30’s.
  • Collect soil samples now for testing if desired to prepare for next year’s fertilization.
  • Protect tender vegetables if early frost is predicted by covering them just before sundown.
  • Dig up any frost-sensitive annuals and to bring them indoors for winter blooms.

MID OCTOBER

  • Finish planting tulips, daffodils, crocus, and hyacinth.
  • Begin winterization of plant material.
  • Remove and compost asparagus, peony, and rhubarb tops.
  • Individual garlic cloves can be planted and will result in full garlic bulbs next year.
  • Fertilize established trees and shrubs. Fertilization is especially recommended for more unique varieties and plants under stress.
  • Fertilize houseplants for the last time until March.

LATE OCTOBER

  • Wrap trunks of young or thin-barked trees such as green ash, honeylocust, maple, and linden with tree wrap.
  • Rake or mow leaves and make sure thick leaves are not left under the snow all winter. If leaves have fungus or disease make sure to remove them.
  • Continue mowing the lawn until it stops growing.
  • Note crabgrass areas of lawn after they are killed by hard frost and apply crabgrass preventer to prevent its return in the future.
  • Drain hoses and empty bird baths before the first hard frost.

Fall Bulbs: Preparing Now for Spring’s Blooms

Fall is officially here and many of us couldn’t be more excited about mums, kale, pumpkins, and fall decor. Thinking of spring blooms is probably far from your mind! However, fall bulb care and planting is a small, but important, task on your fall landscaping “to-do” list that can make a beautiful impact statement for your home. So, what do you need to consider when planting fall bulbs and how do you go about it? Read on to learn more!

What are bulbs, and why should we plant them in the fall?

Simply put, a bulb essentially stores and feeds a developing flower as it grows to maturity. They have the capability to store food and nurture themselves through adverse conditions, like cold winters, and require a restful dormant period to develop. Planting bulbs at the right time in the fall will ensure that they’re settled in for that dormant period, will establish roots, and will sustain themselves until spring growth begins. Common bulbs for our area are tulips, daffodils, hyacinth, allium, and iris.

When should we plant fall bulbs?

Fall bulbs should be planted when the ground temperature is 55 degrees or cooler. Typically, here in Wisconsin, that means starting in late September or early October. Waiting until its cool enough is very important; planting when the soil is too warm can encourage your bulbs to produce tender top growth. Plant anytime through early-mid November, as long as the soil can be worked.

Where should bulbs be planted?

Bulbs will thrive best in a sunny space, allowing them to soak up as much of the warm spring rays as possible. Make sure the location gets 4 hours or more of light per day, and plant in an area that has good drainage.

What is the best way to plant bulbs?

Plant your bulbs pointed side up (when in doubt, plant the bulb on its side… it will find its way up!). As a rule of thumb, plant about 3x as deep as the height of your bulb. This can give you the opportunity to plant many bulbs in one area. For example: you can layer a small bulb like hyacinth on top of daffodils… you could even plant allium below the daffodils, ensuring a long season of spring/early summer blooms. In fact, planting multiple bulbs in a large hole creates a beautiful mass of flowers come spring.

Ongoing Care

Fertilize your bulbs at the time of planting, and again when growth emerges in the spring.

After the blooms are finished, don’t cut back the plant’s foliage until it becomes yellow and wilted. The plant will take energy from its healthy foliage to help nourish the bulb for future blooms!

As always, reach out to our talented and knowledgeable team members with any questions! We’re always here to help you dream, build, and nurture your outdoor haven!

What’s the Deal with Poly Furniture? Top 8 Things to Consider when Buying!

Polyethylene furniture (or “poly” as it is more often called) has quickly taken the outdoor furniture market by storm. Adirondack chairs, dining sets, lounge chairs, and even fire tables are now being made with the stuff. Why? Because it’s awesome.

What is polyethylene?

Polyethylene is a man-made plastic usually made from recycled materials. It is used in a variety of different items such as tubes, plastic parts, laminates and even furniture!

What are the benefits of poly furniture?

Poly furniture comes in a huge range of colors and is colored all the way through. This means that (with the exception of a few colors) there will be very minimal fading and any nicks or scratches will barely show! Depending on the manufacturer it is typically very heavy, so you do not have to worry about it blowing across your patio when the wind picks up. Lastly, it can be left outside year-round (even in Wisconsin snow), so you do not have to worry about dragging it inside at the end of the year. All in all, poly furniture is incredibly low maintenance, long-lasting, and a great addition to your outdoor space.

What should you pay attention to when buying poly furniture?

  1. Comfort. When buying poly furniture, you definitely want to sit in the exact chair or one very similar because each style and manufacturer will have slightly different designs. If you want to enjoy your furniture in your backyard, do not buy it without test driving it!
  2. Structure. Better quality poly furniture will be shaped for comfort and have more boards. The frame will also vary between manufacturers. Some, such as Berlin Gardens, will have fully welded aluminum frames while others will have cheaper and lighter frames that are not fully welded.
  3. Density. In addition to the structure, stronger and heavier boards are less likely to warp. A classic Adirondack chair from Berlin Gardens weighs 65 pounds and is composed primarily of recycled milk jugs. There are 10 milk jugs per pound of product, so one Adirondack chair is made up of about 650 milk jugs.
  4. Hardware. Is the hardware clearly visible or is it primarily tucked in places that are not visible? What type of hardware do the chairs use? Berlin Gardens uses marine grade alloy chrome plated stainless steel.
  5. Finish. Some poly companies will offer different finishes such as standard and natural. Standard finish is going to be smooth and a little bit glossier. If this is the look you’d prefer, you definitely should pay attention to how smooth it feels when comparing manufacturers! On the other hand, many companies offer a natural finish option. This is going to look more like wood and have a much richer appearance.
  6. Color. In the hot summer sun, poly furniture can get warm. If you have a patio that you know will be right in the hot sun, you may want to consider a lighter color that will stay cooler throughout the summer!
  7. Warranty. Good products have good companies that stand behind their products. Buying furniture is an investment and you want it to last! For example, Berlin Gardens poly comes with a 20-year warranty and they have outstanding customer service.
  8. Manufacturer. Where is the furniture produced? The manufacturer has a lot to do with the smoothness, construction, and overall quality of the product. Berlin Gardens is proud to be made by an Amish workforce in Berlin, Ohio.

If you want low maintenance furniture that is built to endure Wisconsin weather and last you a very long time, poly furniture could be the perfect solution. Stop by Vande Hey Company today or check out Berlin Gardens and our other furniture lines here.